

The Ultimate Guide to Fine Enamel Jewelry Repair and Restoration
Enamel Jewelry Repair: When a Fine Piece Deserves Expert Restoration
Enamel jewelry repair can restore a chipped ring, cracked brooch, scratched pendant, or loose enamel pin while protecting the metal, gemstones, and original design.
For a fine, vintage, or sentimental piece, the safest first step is a professional assessment. A jeweler can determine whether the surface is true vitreous glass enamel or cold resin, assess hidden cracks and loose findings, and recommend a repair method that fits the piece's value and construction.
- Small chips or scratches: May be repaired with carefully color-matched cold-cure resin.
- True glass enamel or antique work: Often needs a specialist approach because heat, mismatched glass, or aggressive sanding can cause more damage.
- Loose posts, prongs, or findings: Need structural repair before any cosmetic enamel work.
- Vintage and heirloom jewelry: Should be restored conservatively, with repairs disclosed when collector value matters.
A well-done repair should blend with the surrounding color and finish, but not every piece can be returned exactly to factory-new condition. The goal is to stabilize damage, preserve the original work, and make the repair as unobtrusive as practical.
I am Morris Mervis, and this guide will help you understand what enamel repair involves before deciding whether your jewelry belongs on a professional bench or in a careful DIY project.
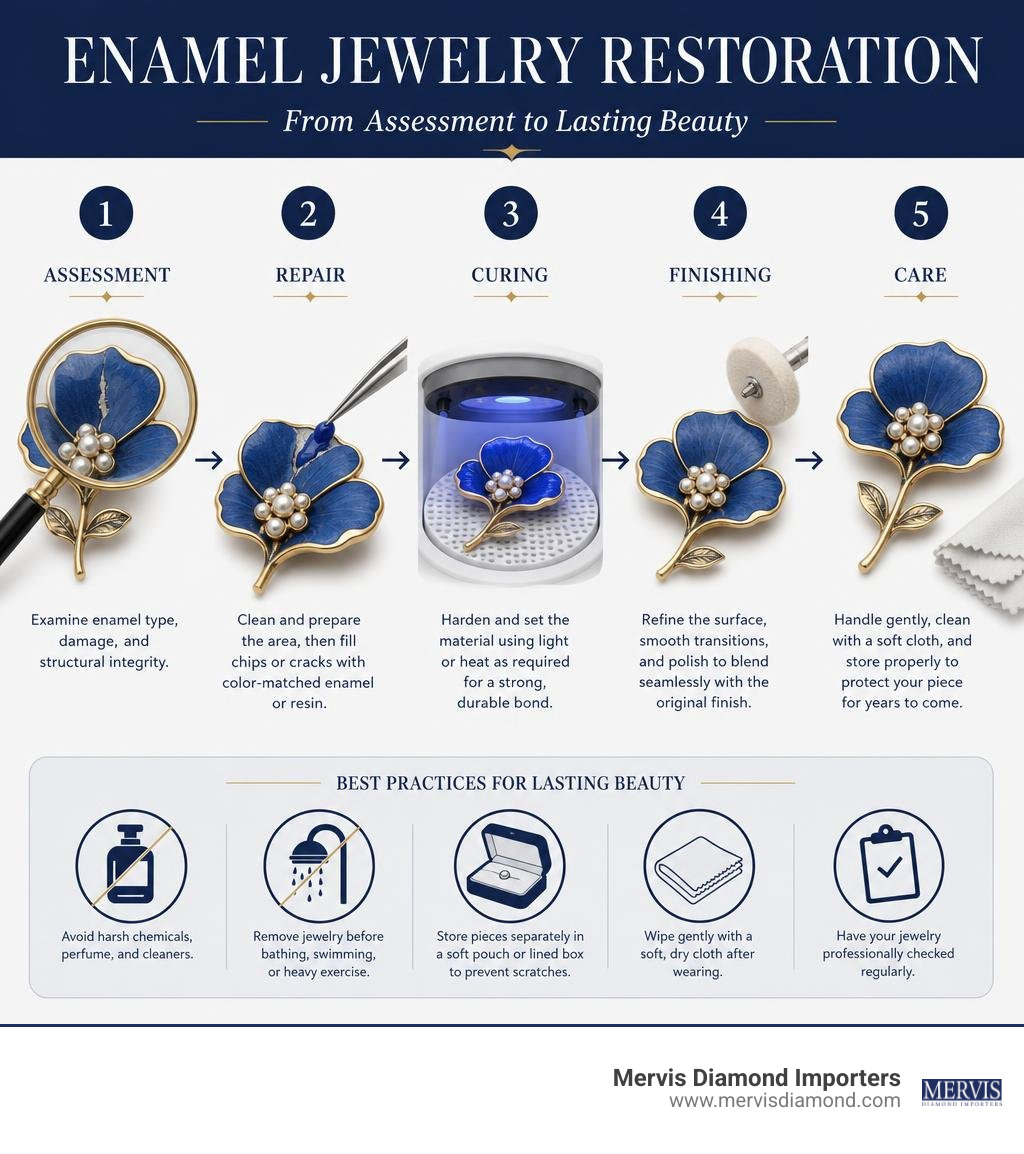
Understanding Enamel Types and Surface Preparation
To achieve a long-lasting enamel jewelry repair, you must first understand the fundamental material science of enameled pieces. Enamel in fine and fashion jewelry falls into two distinct categories: traditional vitreous enamel and modern cold-cure resin enamel. Attempting to repair a piece without knowing which material you are working with often leads to permanent surface damage or complete structural failure.
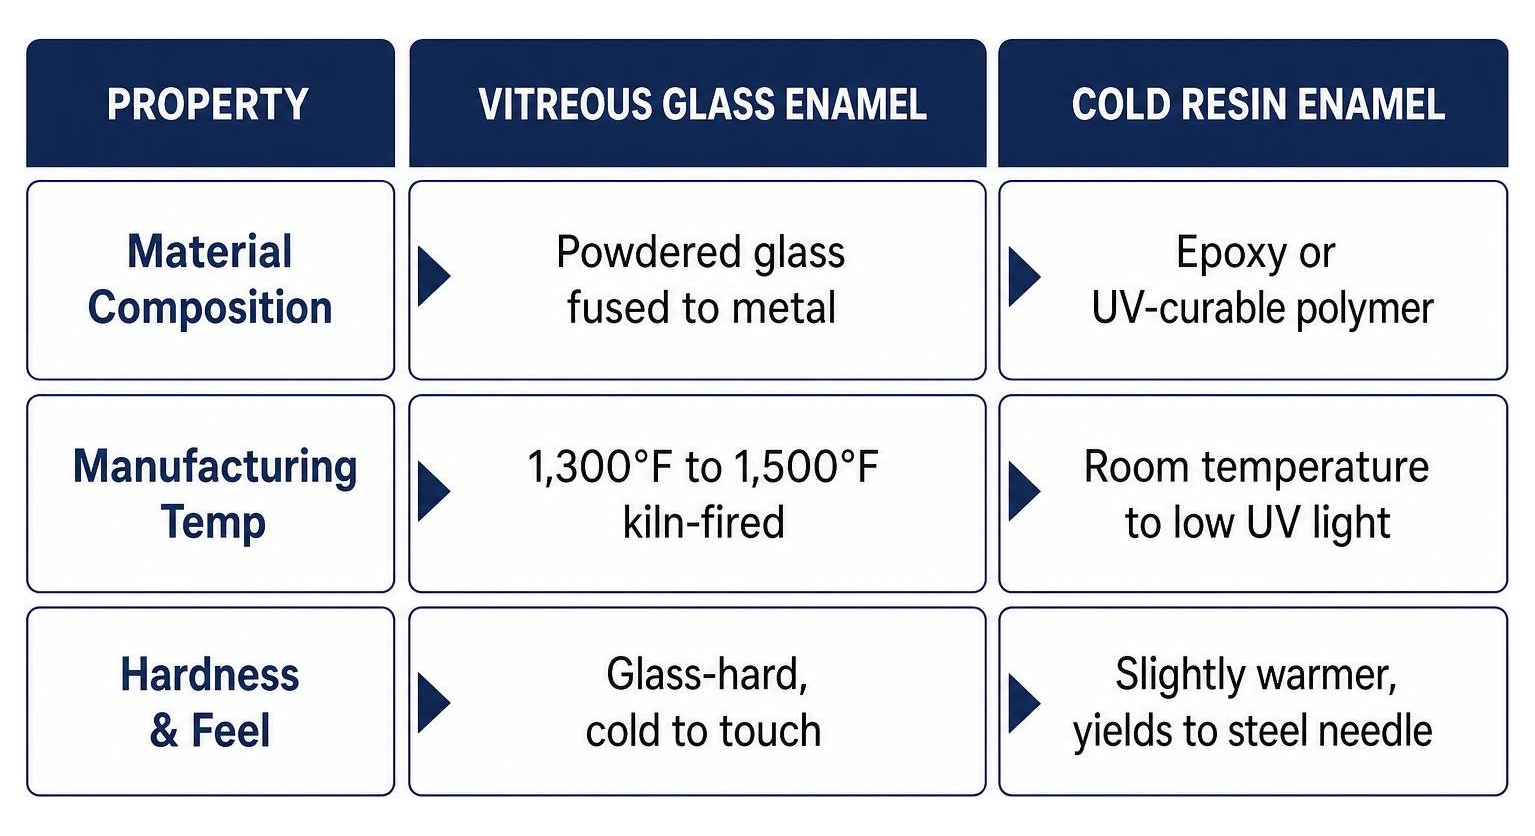
| Property | Vitreous Glass Enamel | Cold Resin Enamel |
|---|---|---|
| Material Composition | Powdered glass fused to metal | Epoxy or UV-curable polymer |
| Manufacturing Temp | 1,300°F to 1,500°F kiln-fired | Room temperature to low UV light |
| Hardness & Feel | Glass-hard, cold to touch | Slightly warmer, yields to steel needle |
| Fracture Pattern | Sharp, glass-like conchoidal chips | Flaking, peeling, or fibrous edges |
| Repair Compatibility | Cold-cure resin touch-up or full re-fire | Direct UV resin fill or epoxy patch |
| Heat Tolerance | High, but sensitive to thermal shock | Low, scorches or melts under torch heat |
When evaluating damage, an inspection under 10x magnification using a jeweler's loupe reveals the microscopic behavior of the break. Vitreous enamel breaks like glass, showing sharp, curved conchoidal fractures along the edge of the metal cell. Cold resin, by contrast, shows softer indentations or flaking away from the substrate.
Identifying Vitreous vs. Cold Enamel
Distinguishing between true glass and synthetic resin is a vital first diagnostic step. Vitreous glass enamel is made of silica, flux, and metal oxides fused to precious metal substrates at temperatures exceeding 1,300°F to 1,500°F. When tapped gently with a metal probe, genuine vitreous enamel emits a distinct, sharp metallic "clink."
You can also perform a subtle scratch test in an inconspicuous area (such as the interior lip of a setting or near the back clasp) using a fine steel needle:
- Vitreous Enamel: The steel point slides across the surface without leaving a mark, as glass possesses a higher Mohs hardness rating than standard steel.
- Cold Enamel: The needle leaves a faint impression or indentation in the polymer matrix.
Knowing this distinction dictates your restoration strategy. Subjecting cold enamel to torch heat during prong rebuilding or sizing will instantly char and destroy the surface. Conversely, attempting to patch vitreous glass using incorrect thermal methods can cause thermal shock, causing the surrounding glass to crack violently across its stress lines.
Essential Tools for Enamel Jewelry Repair
For high-grade cold-cure repairs that preserve original detailing without high-heat risks, specialized conservation tools are required:
- Optical-Grade Resins: High-clarity UV-curable acrylic resins or slow-curing optical epoxies (such as HXTAL NYL-1) that mimic the refractive index and glass-like depth of true vitreous enamel.
- Dry Mineral Pigments & Mica Powders: Ultra-fine dry ground pigments for precise color matching without introducing water or alcohol, which disrupt polymer cross-linking.
- Precision Applicators: Stainless steel jeweler’s picks, acupuncture needles, or fine cocktail sticks for micro-point color placement.
- Abrasives & Polishing Materials: 400-grit sandpaper for bare metal keying, alongside wet micro-mesh sanding pads ranging from 1,500 grit to 12,000 grit.
- Curing Equipment: High-intensity 36W UV curing lamps (365nm to 405nm wavelength) or protective glass dust covers for 24-48 hour epoxy cures.
For more complex structural evaluations or assistance sourcing professional tools, reviewing specialized bench restoration guides provides valuable context for bench setups.
Cleaning and Surface Preparation Mechanics
Surface preparation determines the success or failure of any repair. Industry studies reveal that adhesion fails 90% of the time due to improper surface preparation and residual oils. Skin sebum, polishing compound residue, and environmental grime prevent adhesives and resins from forming a direct mechanical bond with the metal substrate.
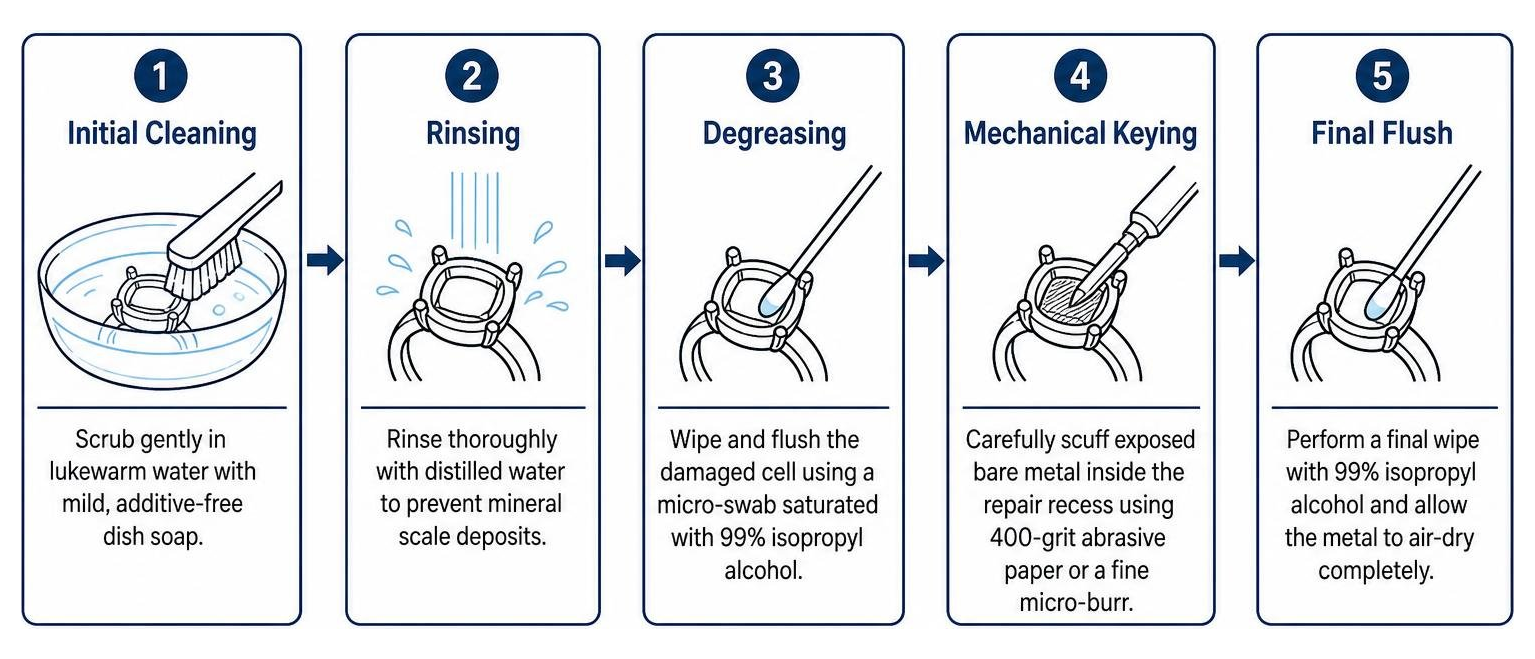
- Initial Cleaning: Scrub the item gently in lukewarm water mixed with mild, additive-free dish soap using a soft-bristled brush to lift surface grease and dirt.
- Rinsing: Rinse thoroughly with distilled water to prevent mineral scale deposits inside deep chips.
- Degreasing: Wipe and flush the damaged cell using a micro-swab saturated with 99% isopropyl alcohol. Avoid lower concentrations like 70% rubbing alcohol, as their water content retards evaporation and leaves film residues.
- Mechanical Keying: Carefully scuff exposed bare metal surfaces inside the repair recess using 400-grit abrasive paper or a fine micro-burr. This creates microscopic anchor teeth for the resin.
- Final Flush: Perform a final wipe with 99% isopropyl alcohol and allow the metal to air-dry completely.
To maintain your restored pieces safely over time without dulling delicate enamel finishes, refer to our comprehensive Jewelry Cleaning Ultimate Guide 2026.
Step-by-Step Restoration: Cold-Cure Repairs and Structural Fixes
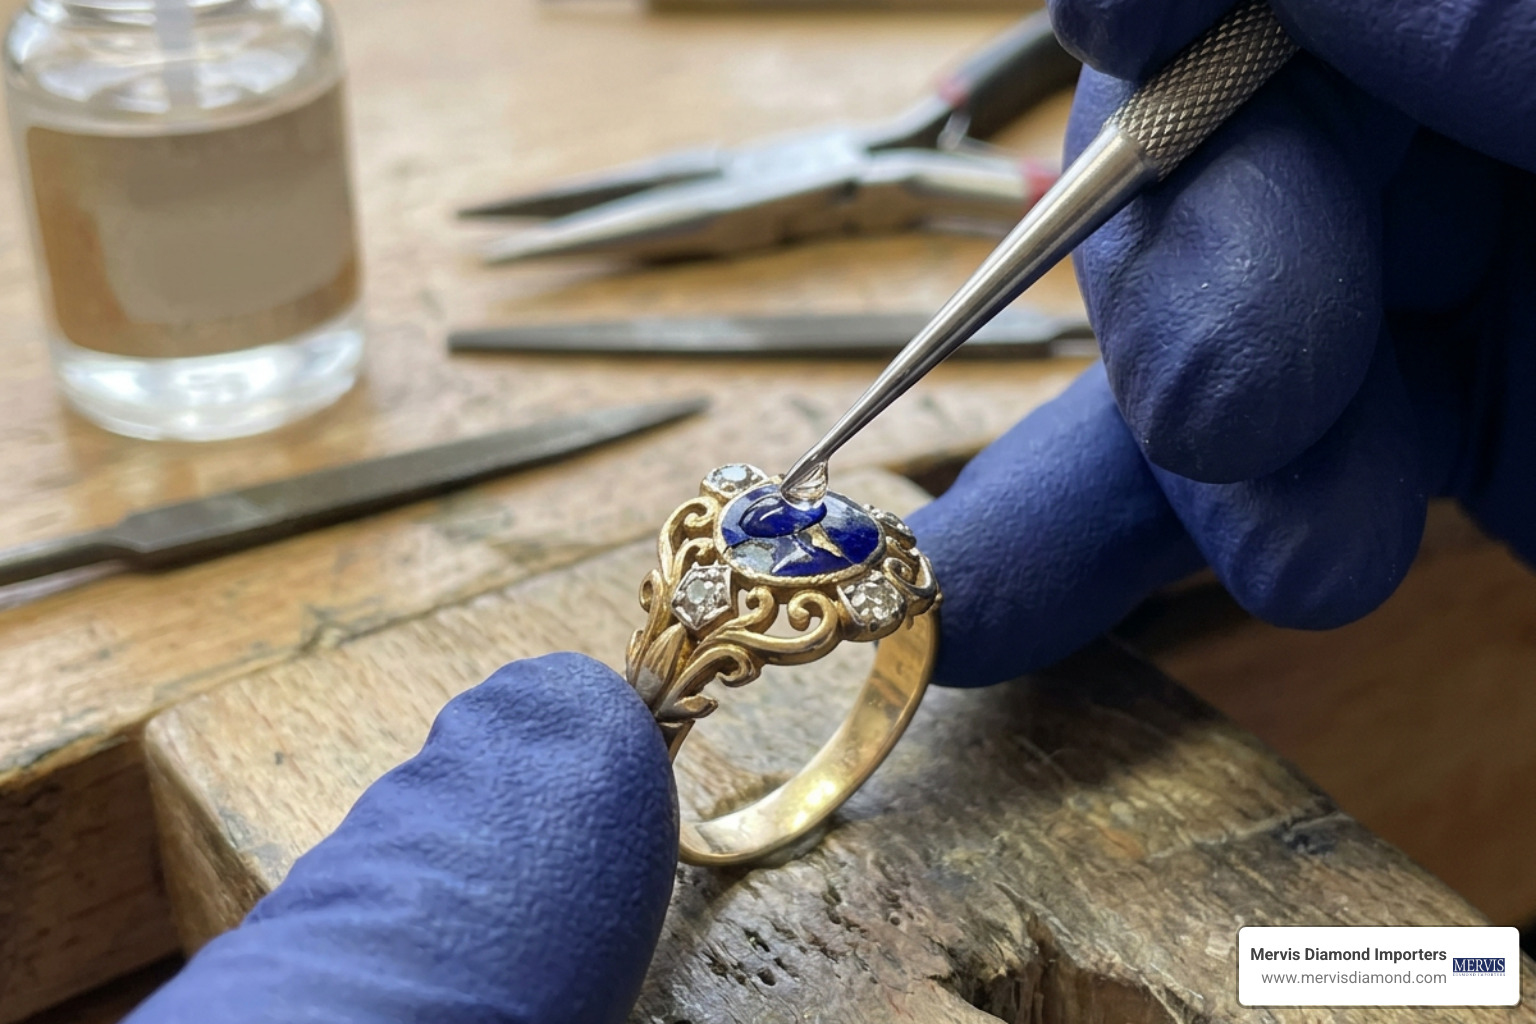
Cold-cure resin restoration is the safest method for repairing chipped, scratched, or missing enamel on vintage and fine jewelry. It eliminates the need to expose delicate gold, silver, or heat-sensitive gemstones to a 1,500°F kiln. By building depth with optical resins and dry pigments, you achieve a seamless finish that matches surrounding vitreous glass.
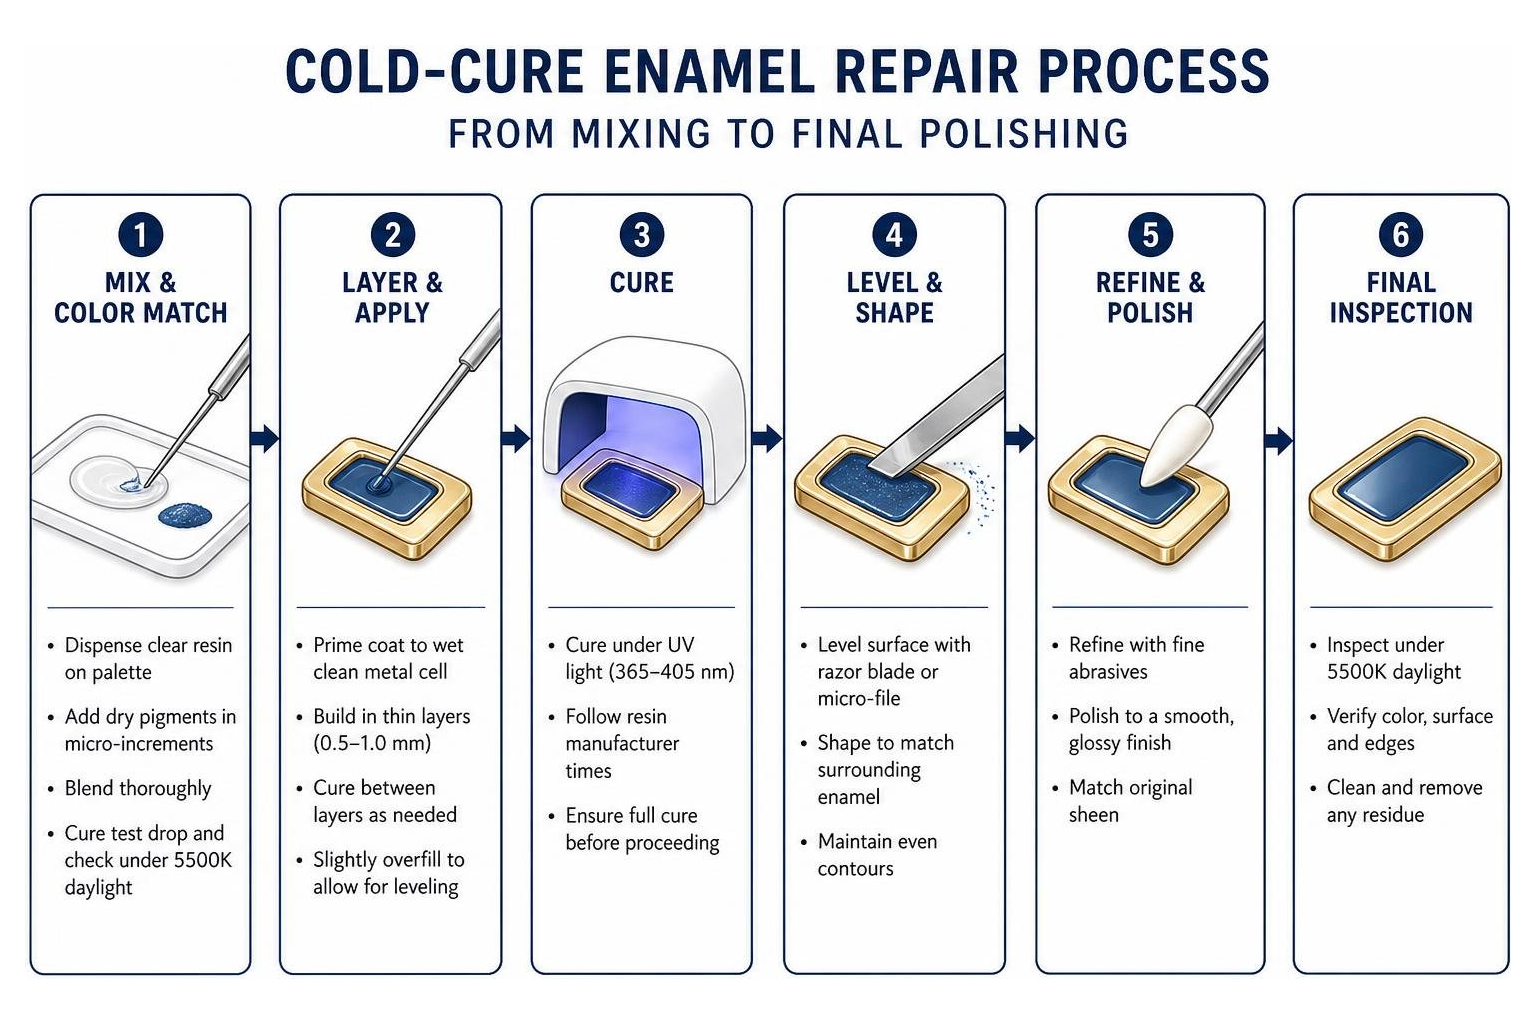
Cold-Cure Step-by-Step Enamel Jewelry Repair Method
Color calibration requires controlled lighting. Never match pigment shades under yellow incandescent or warm LED lights; always work under 5500K natural daylight or a color-corrected bench lamp. Pigments appear darker as resins cross-link and cure, so test drops should always be cured on a white mixing tile before applying resin to the piece.
Step 1: Color Matching and Resin Mixing
Dispense a small blob of clear UV-curable resin or mixed optical epoxy onto a clean white ceramic palette. Add dry pigments in micro-increments using the tip of a needle. Blend thoroughly to ensure zero dry clumps remain. Cure a single test droplet under your UV light and hold it directly against the original enamel under 5500K daylight to verify match accuracy.
Step 2: Layering and Micro-Application
Never fill a deep chip in a single thick pour, which causes shrinkage gaps and uncured pockets. Apply a thin prime coat into the clean metal cell using an acupuncture needle to wet the surface. Next, layer the color-matched resin in increments no thicker than 0.5mm to 1.0mm.
Step 3: Heat Flash Bubble Removal
Trapped micro-bubbles ruin clarity. Briefly pass the flame of a butane lighter or micro-torch 2 to 3 inches above the uncured resin surface for less than one second. The sudden burst of gentle radiant heat lowers surface tension, popping micro-bubbles instantly without heating the underlying metal.
Step 4: Photo-Polymerization Curing
Expose each 0.5mm layer to a high-intensity UV lamp for 60 to 120 seconds. If using two-part optical epoxy like HXTAL NYL-1, place an inverted glass beaker over the piece to create a dust-free dome and allow it to cure undisturbed at 70°F–75°F for 24 to 48 hours.
Step 5: Precision Wet-Sanding Sequence
Mask all surrounding precious metal border areas with low-tack painter's tape to protect metalwork from stray abrasives. Using wet micro-mesh sanding pads lubricated with water, sand the repair level with the original enamel surface. Work systematically through grit levels:
- Start with 1,500 grit to flush high spots.
- Progress to 2,000 and 3,000 grit to eliminate surface scratches.
- Finish with 6,000, 8,000, and 12,000 grit to achieve optical translucency.
Note: Always use water as a lubricant when sanding resin repairs. Dry friction generates heat that softens polymer bonds and dulls the repair finish.
Step 6: High-Gloss Polish
Apply a tiny dab of fine plastic polishing compound or cerium oxide slurry to a soft felt wheel mounted on a rotary tool. Run the tool at low RPMs (under 5,000 RPM) in continuous circular motions across the repair site to restore a brilliant, glass-like sheen.
For further reading on cold-cure enamel methodologies, consult the guide on How to Repair an Enamel Ring [Pro DIY Restoration Guide] - RapidRepair.blog.
Fixing Loose Findings, Posts, and Rings
Enamel pins, brooches, and rings frequently suffer mechanical damage, such as snapped tie-tack posts, wobbly pin hinges, or thinned ring shanks. Repairing these elements requires balancing structural stability with thermal protection for adjacent enamel.
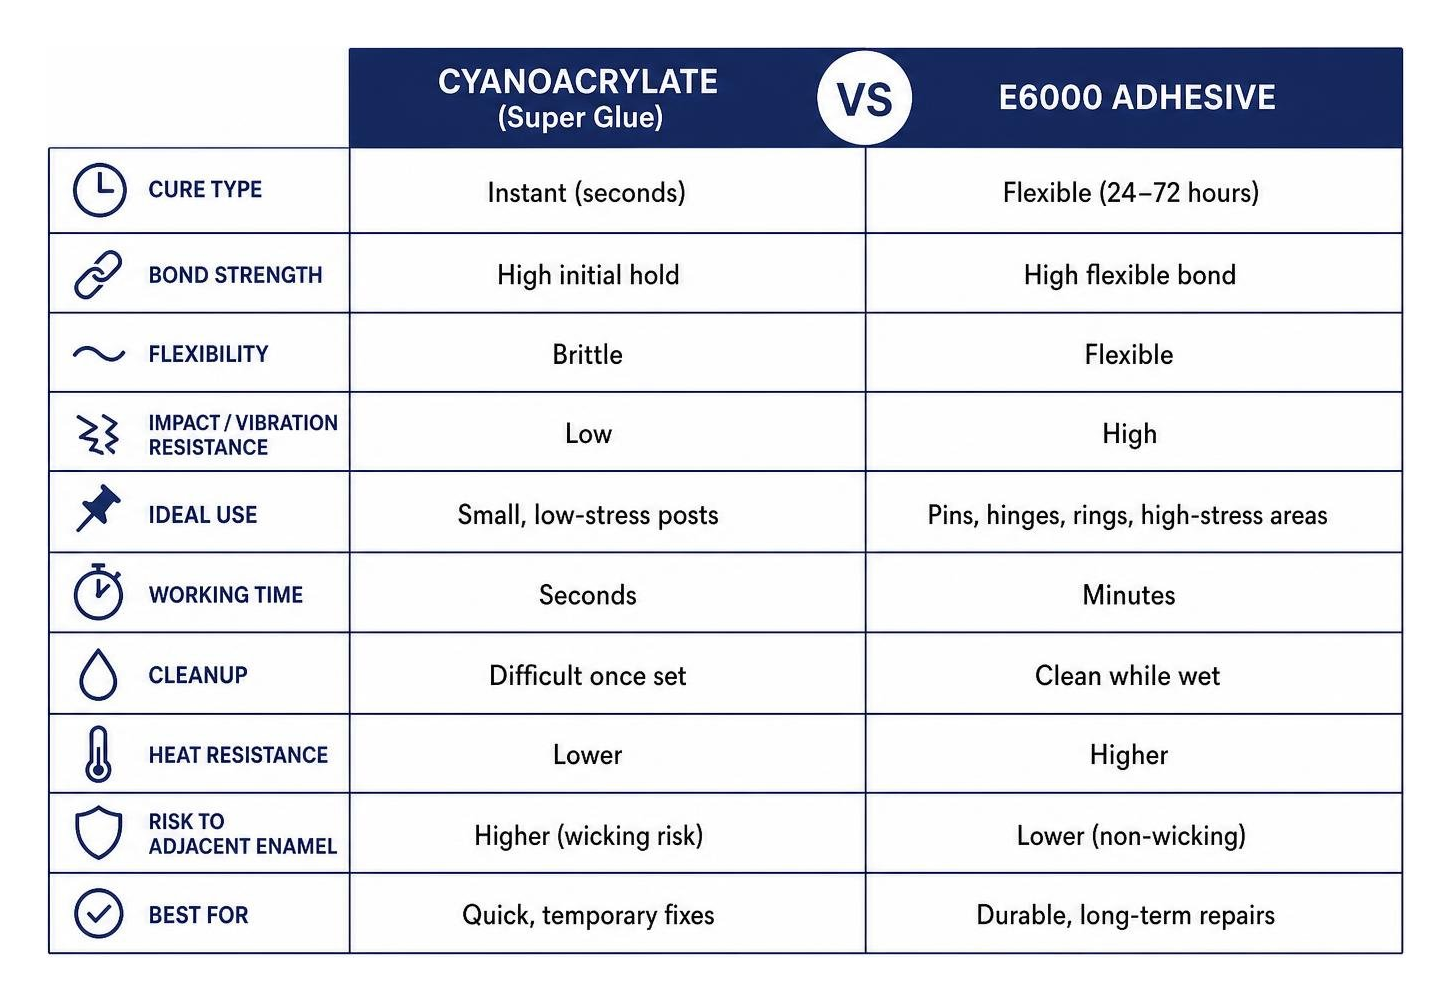
When reattaching a broken pin post, never attempt to glue over old, wobbly adhesive deposits.
- Clean the back of the badge down to bare metal using a micro-grinding burr.
- Sand both the post base and the mounting area with 400-grit sandpaper to create grip teeth.
- Degrease both surfaces with 99% isopropyl alcohol.
- Apply industrial-grade E6000 craft adhesive or a structural cold-cure epoxy with a toothpick.
Why E6000 over Superglue? Cyanoacrylate superglue dries into a rigid, brittle crystalline layer that snaps easily under the shear stress of removing a pin from heavy fabric like denim or leather. E6000 retains slight flexibility, creating a shock-absorbing bond that resists mechanical force over time.
For high-end gold or platinum jewelry featuring broken prongs or thin shanks, traditional soldering torches cannot be used near enamel without risking catastrophic thermal shock and glass cracking. In these cases, professional bench jewelers utilize localized pulse laser welding. A laser welder delivers micro-bursts of heat focused within 0.1mm thresholds, fusing replacement precious metal seamlessly without raising the temperature of adjacent enamel cells.
If your repair involves broken link chains or damaged metal connectors attached to enameled pendants, review our guide on Chain Replacement Necklace options. Additional pin-specific details can be found at How to Repair Enamel Pin Damage [Professional Restoration Guide] - RapidRepair.blog.
Professional Enamel Jewelry Repair vs. DIY Restoration
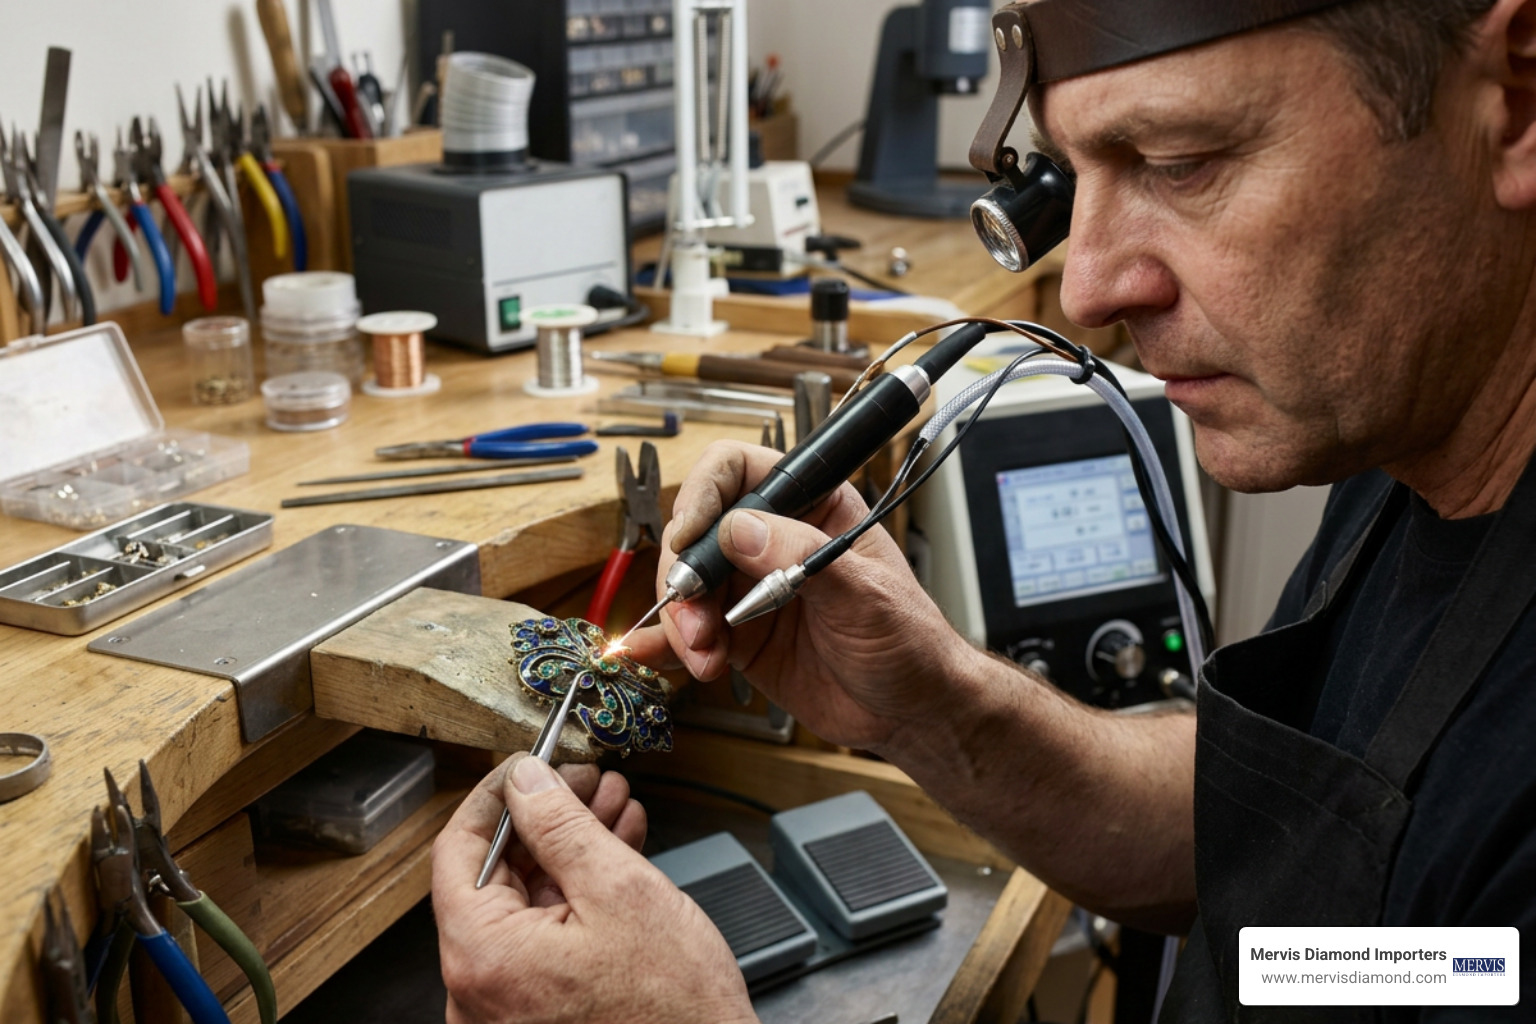
Deciding whether to handle an enamel jewelry repair at home or entrust it to a professional jeweler depends on the item's historical significance, monetary value, and structural needs. While minor touch-ups on costume pieces can be rewarding DIY projects, fine gold jewelry, antique guilloché, and heirloom items require specialized bench equipment and experienced craftsmanship.
Turnaround Times, Service Costs, and Value Impact
Professional enamel restoration combines conservative preservation techniques with modern bench technologies. At Mervis Diamond Importers, our master jewelers evaluate every piece to ensure that structural integrity and aesthetic value are preserved.
For standard mail-in or in-store professional enamel services across our Washington DC, Rockville MD, and Tysons VA locations, typical pricing structures reflect itemized work scope:
- Base Service Fee: Starts around $33.50 for initial diagnostics, substrate preparation, and setup.
- Per-Color Fee: Approximately $10.00 per individual enamel color matched and mixed.
- Per-Location Fee: Approximately $10.00 per distinct repair location on the piece.
Turnaround time for standard cold-cure or resin-based enamel repairs ranges between 10 to 20 business days from receipt. When structural metalwork—such as laser retipping worn prongs, rebuilding thinned shanks, or custom alloy milling—is required alongside enamel restoration, bench work takes 10 to 14 days, extending up to 21 days for intricate custom milling on estate heirlooms.
For comprehensive information regarding professional repair options in the Washington metropolitan area, explore local listings via THE BEST 10 Jewelry Repair in ROCKVILLE, MD.
Critical Mistakes to Avoid During Restoration
Whether restoring an item at your home bench or assessing a previously attempted repair, avoid these common restoration pitfalls:
- Using Nail Polish: Nail polish lacks cross-linked chemical polymers and UV stability. It shrinks rapidly, peels away from metal borders, and yellows within weeks.
- Using Brittle Superglue: Cyanoacrylate adhesives crystallize and snap when exposed to everyday impact or temperature shifts.
- Dry Sanding Repairs: Sanding cured resin without water lubrication creates dry friction heat that melts the resin edge, causing cloudy white scars and bond failure.
- Torch Heating Glass Enamel: Applying a jeweler’s torch to repair metal near vitreous enamel causes instant thermal shock, shattering original glass work beyond recovery.
- Skipping Metal Degreasing: Applying adhesive over skin oils guarantees a bond failure rate exceeding 90%.
For practical bench strategies to avoid damage, explore our guide on Quick Jewelry Repair Tips 2026 and the specialized insights at How to Repair Enamel on Vintage Jewelry [Pro Restoration Guide] - RapidRepair.blog.
Frequently Asked Questions About Enamel Jewelry
Will repairing enameled jewelry ruin its antique valuation?
When executed using reversible cold-cure conservation techniques, professional enamel repair stabilizes ongoing damage and enhances overall marketability. For rare antique items (such as Victorian Basse-Taille or Art Nouveau Plique-à-jour), high-heat re-firing can destroy original patinas and slumps antique metals. Using cold conservation resins protects historical integrity. Full disclosure of restoration work is standard practice when presenting pieces to fine collectors.
How long do UV resin and epoxy enamel repairs last?
High-grade cold-cure UV resin and optical epoxy repairs last for years under normal wearing conditions. Because cross-linked polymers are resistant to moisture and daily wear, they retain structural adhesion exceptionally well. Over extended periods, surface exposure may reduce gloss slightly; however, original clarity can be easily restored through a quick bench re-polishing cycle using micro-mesh pads and finishing compounds.
Can I fix chipped vitreous enamel without using a high-heat kiln?
Yes. Professional restorers frequently repair chipped vitreous glass enamel using optical cold-cure epoxies like HXTAL NYL-1 or specialized UV-curable resins. These cold-cure solutions closely match the optical clarity, refractive index, and surface gloss of true glass enamel without subjecting surrounding metals, hand-engraved guilloché patterns, or heat-sensitive gemstones to damaging kiln temperatures exceeding 1,300°F.
Conclusion
Restoring fine enamel jewelry requires balancing historic appreciation with precise material chemistry. Whether addressing a minor surface scratch on a daily ring or restoring a cherished family heirloom, understanding enamel properties ensures your jewelry remains vibrant for generations.
When delicate heirlooms require expert care, trust the master jewelers at Mervis Diamond Importers. Serving clients across Washington DC, Rockville MD, and Tysons VA, our team delivers uncompromised bench craftsmanship, advanced pulse laser welding, and meticulous restoration services.
Explore our full range of master bench services by visiting our main Jewelry Repairs portal, or learn how to safeguard your fine collection with our expert guide on How to Care for a Diamond Ring. Contact Mervis Diamond Importers today to schedule a personal consultation with our master goldsmiths.